česky | english
How to replace a revoked certificate
Suppose that you has revoked a valid certificate by mistake. When you find that you still need it, it cannot be returned. Once revoked, the certificate is set invalid and cannot be revived or restored. You cannot use its serial number, because it's unique within one CA (here CAcert).
However, if you have the original CSR (Certificate Signing Request), or at least the corresponding private key, you can let CAcert issue a new certificate with the same key pair as the original one. It will have another serial number and expiration date. But this usually does not matter, if the function of the necessary application/site isn't tied to the certificate serial number.
You have certainly had a private key to the original certificate. It didn't even emerge, or changed. Look for it on the device that used the original certificate, or in backups *.p12 or *.pfx. These backups usually contain a private key, your certificate and root certificate(s) of the issuer (here CAcert). However, after revoking your certificate, its backup will no longer help you.
Issuing using the former CSR
This procedure is very simple. If you have CSR saved in a file, then it's sufficient to re-submit it to issue a certificate, and because the key pair remains unchanged, there is no need to take further steps except installation issued certificate.
Issuing if you only have a private key
For the convenience of users CAcert used and still uses generating CSR directly from the browser. Some browsers are still able to this day, but most of them don't support related <keygen> mark anymore. If your original certificate was created that way, you have no CSR file that could be reused. It is necessary to find a private key and submit it to a program that does create a corresponding public key, re-create the corresponding CSR and save it to the file. Such a program can be graphical API-driven XCA or command line driven OpenSSL.
Using XCA and a P12 backup
If you have the backup of the revoked certificate in a *.p12 file, you have to import a private key into XCA. Go to the Private Keys tab and find the Import PFX button (PKCS#12). (The function accepts *.p12 files.) Enter the backup password.
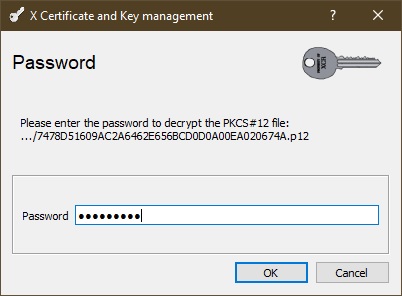
Now the backup opens and shows all the contained items in the PEM notation.
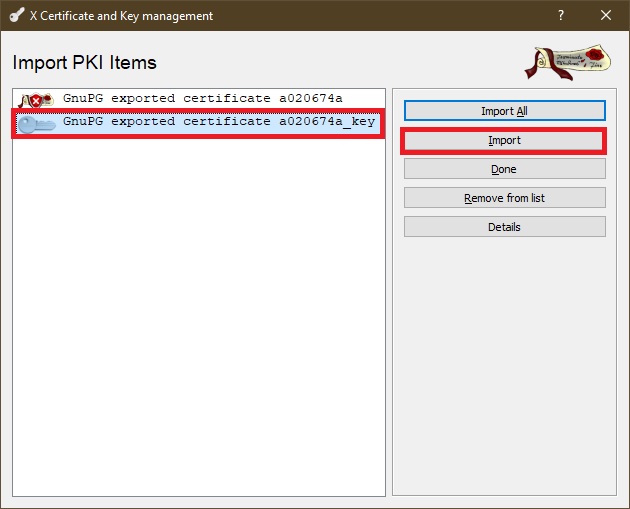
Choose and import only the private key. Note its name.
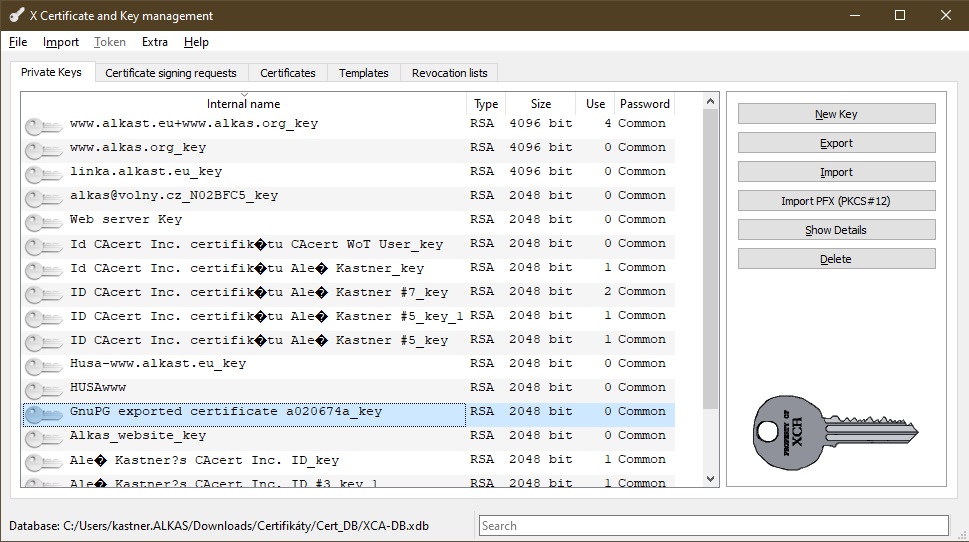
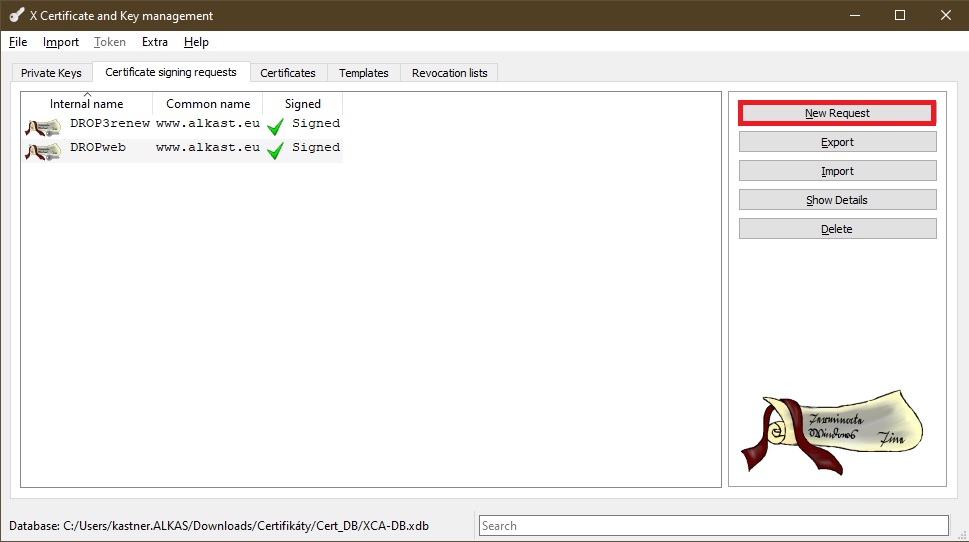
Create a new CSR. On the Certificate Signing Request tab, press the New Request button.
Another window opens. Here you can fill the necessary properties of the new certificate request.
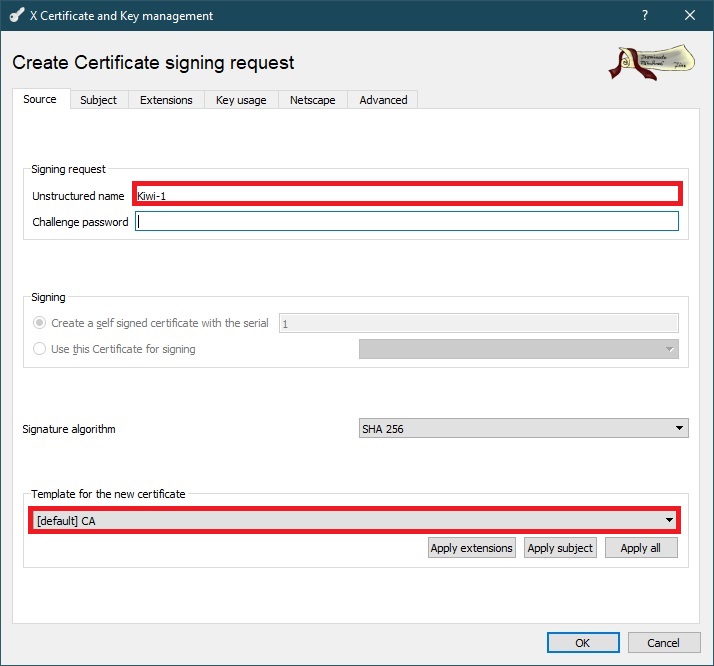
On the Source tab, name the request and select the certificate template.
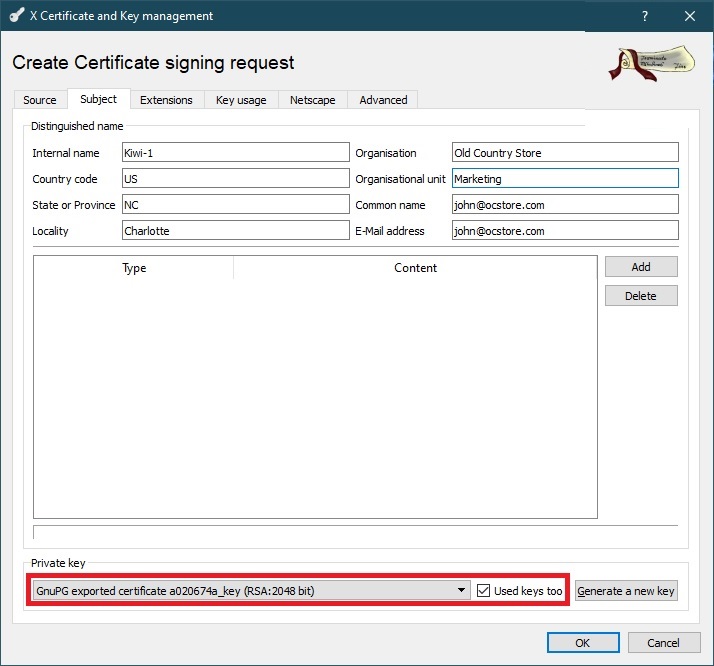
On the Subject tab, select the name of the imported private key.
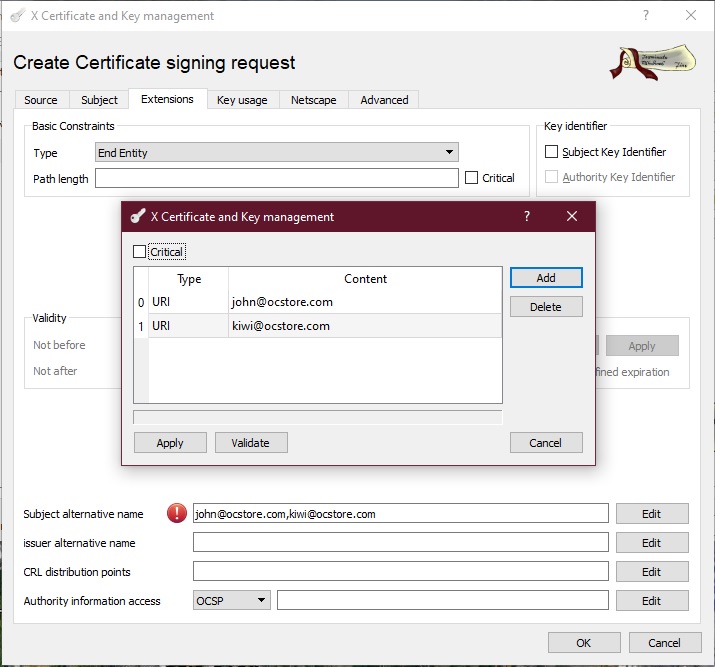
On the Extensions tab, add, if needed, alternative names (SANs).
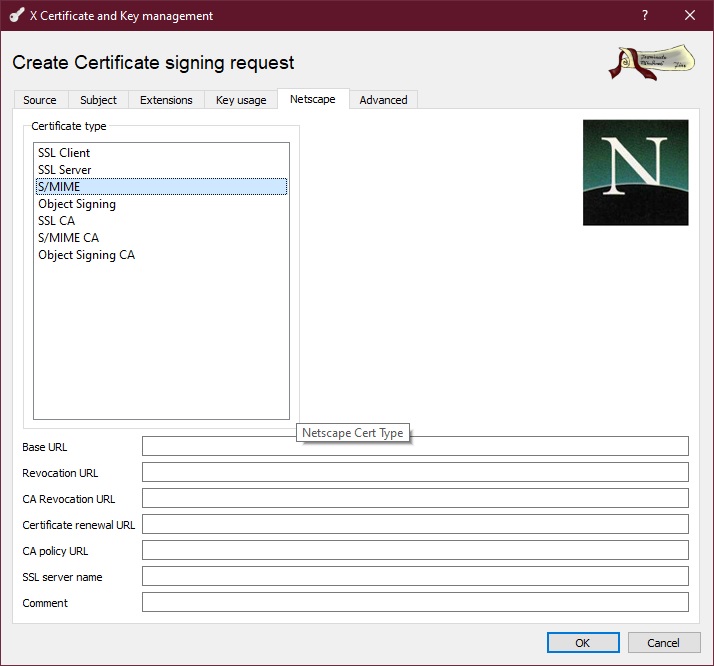
On the Netscape tab, select the certificate type from the list. CAcert will complement other certificate data using your account. Finally press OK.
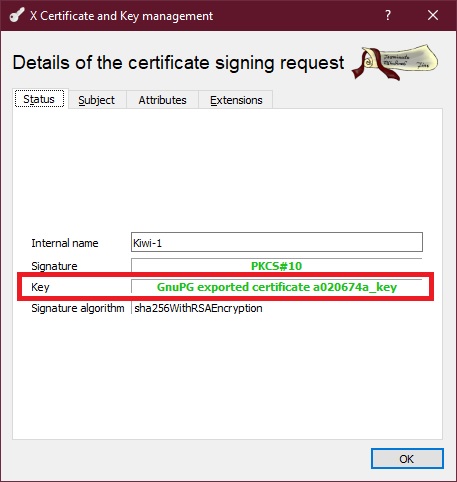
The request appears in the list on the left. You can see its details, after you press the Details button.
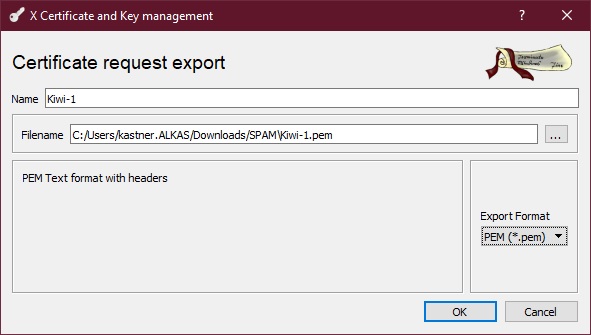
Export the created request to a *.pem, *.csr, or *.txt file. Mark the request and press Export. The TXT form of that file is useful, as the file can be easily opened in the text editor, the entire content can be marked and copied to the clipboard (Ctrl-C). The next procedure is straightforward.
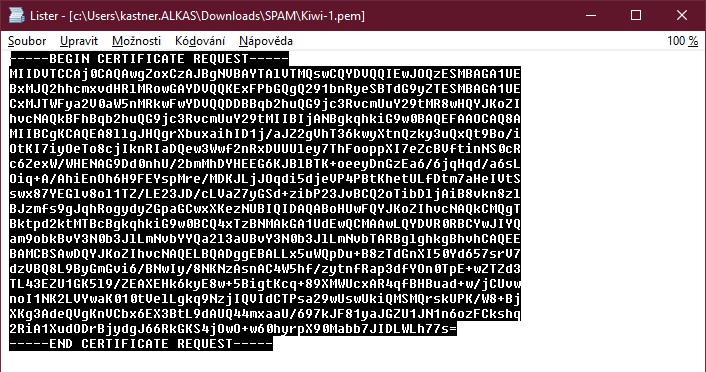
Open the exported file and save the entire contents into the clipboard (Ctrl-C).
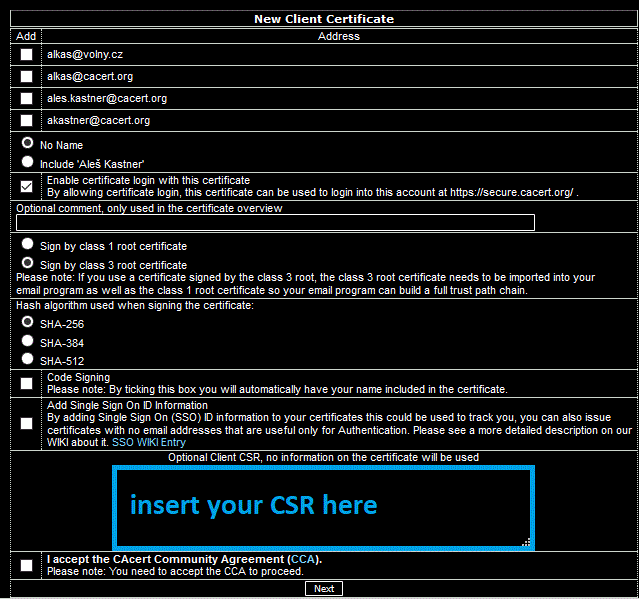
Then log on to CAcert website, select the item New (Client or Server certificate) in the menu and submit CSR pasting (Ctrl-V) it into the request field. Complete the action and download the issued certificate. Then import it into XCA, Certificates tab.

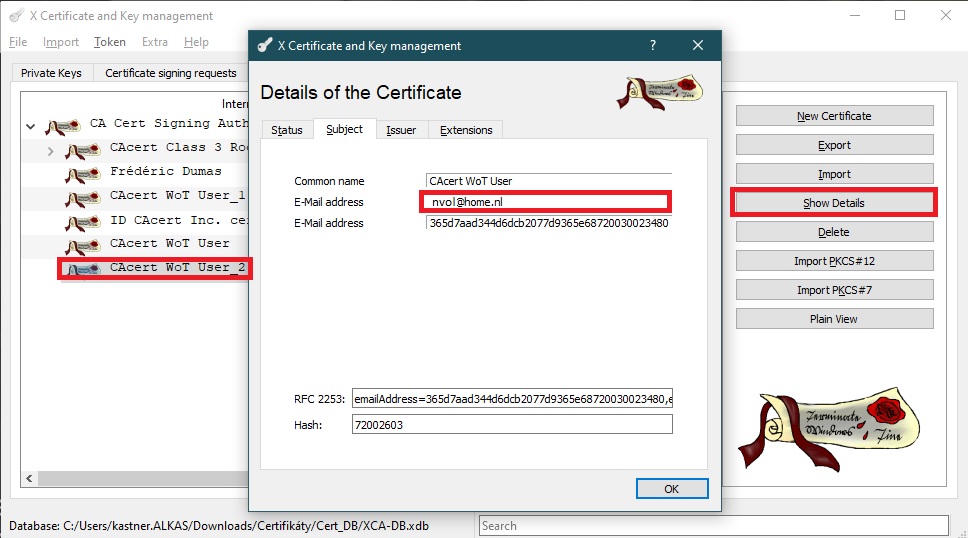
After import you can see details of your new certificate. Do not forget to make a backup *.p12/*.pfx.
Importing private keys to XCA is easy, if you have the backup PKCS#12 in the PEM form in a file; it's also the file from which you have imported a private key & certificate, for example, to Android. openssl creates the private key file, see below. The problem occurs when you have a private key, but you can't get it to the file. Backup and simple saving to the file can be used in the following programs:
- Windows: MMC, module certificates, backups to *.pfx file.
- Firefox and its clones, also Seamonkey and other browsers or e-mail clients (Thunderbird) with custom certificate manager: backups usually to *.p12.
- XCA: Private keys are used directly from the program.
- openSSL on Linux systems: Private keys are saved into *.key files.
Therefore, the private key can usually be saved to a backup file, where you will take it from, or it's already in the (e.g. *.key) file.
Using the openSSL program
Suppose you have the private key, corresponding to the revoked certificate, in a *.key file. Then you can use the following command:
openssl req -new -key <priv_key_file>.key -out <request_file>.pem
The TXT form of the output file is useful, as it can be easily opened with a text editor and mark and copy its contents to the clipboard (Ctrl-C). Now submit the content of the CAcert Web mailbox as described above. Download the resulting PEM certificate as a .crt file.
Now you have both the new certificate and the corresponding private key, which is the private key corresponding to both revoked and new certificates. For some programs it is sufficient, but you need to create a "backup" file *.p12/*.pfx; to do this, use the command:
openssl pkcs12 -in <issued_certificate>.crt -inkey <priv_key_file>.key -export -out <backup>.p12
To do this, you will have to enter the private key password (1x) and set the backup file password (2x).
The <backup> file contains the certificate and the corresponding private key. It can be imported by the certificate manager under the Personal tab.
